
Thursday, November 22, 2012
Friday, August 3, 2012
Creations by Gill M Design Team August Challenge
Welcome to Creations by Gill M August Design Challenge
Recently one of our friends had her first baby, a beautiful baby girl. We were very impressed to hear from the beginning she was using a birthing coach and going natural all the way. She was due July 4th, but of course, being the first child had to make a grand entrance on the 8th of July. Our family saw her in person for the first time yesterday, she is absolutely beautiful! Nothing like a newborn baby to renew one's soul! Right?
Congratulations Stewart family!
.JPG)
.JPG)
.JPG)
.JPG)

Fortunately for me, her theme colors correlated with our challenge for this month and after much thought came up with the a canvas portrait. I used my cutting machine for the tree branch, scrolls in the corners and birdhouse. My flowers are punched in various sizes with a scallop punch, twirl cut and then rolled for the distinct look of flowers. I just love these and they are so easy! My green stems are, believe it or not, stems I cut from a silk flower I was going to throw away. These can be such dust collectors. Once I cut what I wanted, I placed them in a plastic bag with course and regular salt, shook until all the dust was off. Like new, cheap and usable! The wooden disc were inked in a light pink color on the rim, rub on letters with 3D glass to make it glossy and sealed. The word beautiful is a dimensional sticker (puffy) left over from another project. Before I placed the picture on, I sprayed sparkle mist to give it some girly glimmer!
Hope you like my project, become a follower, leave a nice comment and join Creations by Gill M and the others designers on our challenge!
Blessings,

Saturday, July 7, 2012
C.R.A.F.T. Package Pals Exchange
I was chosen to participate in the June Package Pals exchange with C.R.A.F.T. This is my second time this year in which I have participated and just love this project. Not only do I get to meet new people from across the country, but love the idea of waiting for your exchange to come in the mail. Below is the items I received from my package pal, Audra from Chicago. Check our her blog here and here to see her site of her vintage store. You may find something you like for your home, to wear or just for fun!
Thanks Audra! Love my package of goodies!

Welcome to our design challenge for July with Creationsby Gill M using Acetate.


Here I created a simple card using a light grey base card stamping a stop watch for the background. I punched a 1" cirlce of black on silver dot paper ($1.00 bin) and I stamped a leaf medallion on acetate with Stazon in black. Rhinetone in the middle to add a touch of glitz. Done. A great card for the special guy in your life!
Blessings,

Wednesday, July 4, 2012
Happy 4th of July

Please have a safe and happy 4th of July...enjoy friends, family and be grateful for all blessing bestowed upon you today and everyday!
Monday, May 28, 2012

Sunday, May 13, 2012

Saturday, May 5, 2012
CBGM May Design Team Challenge
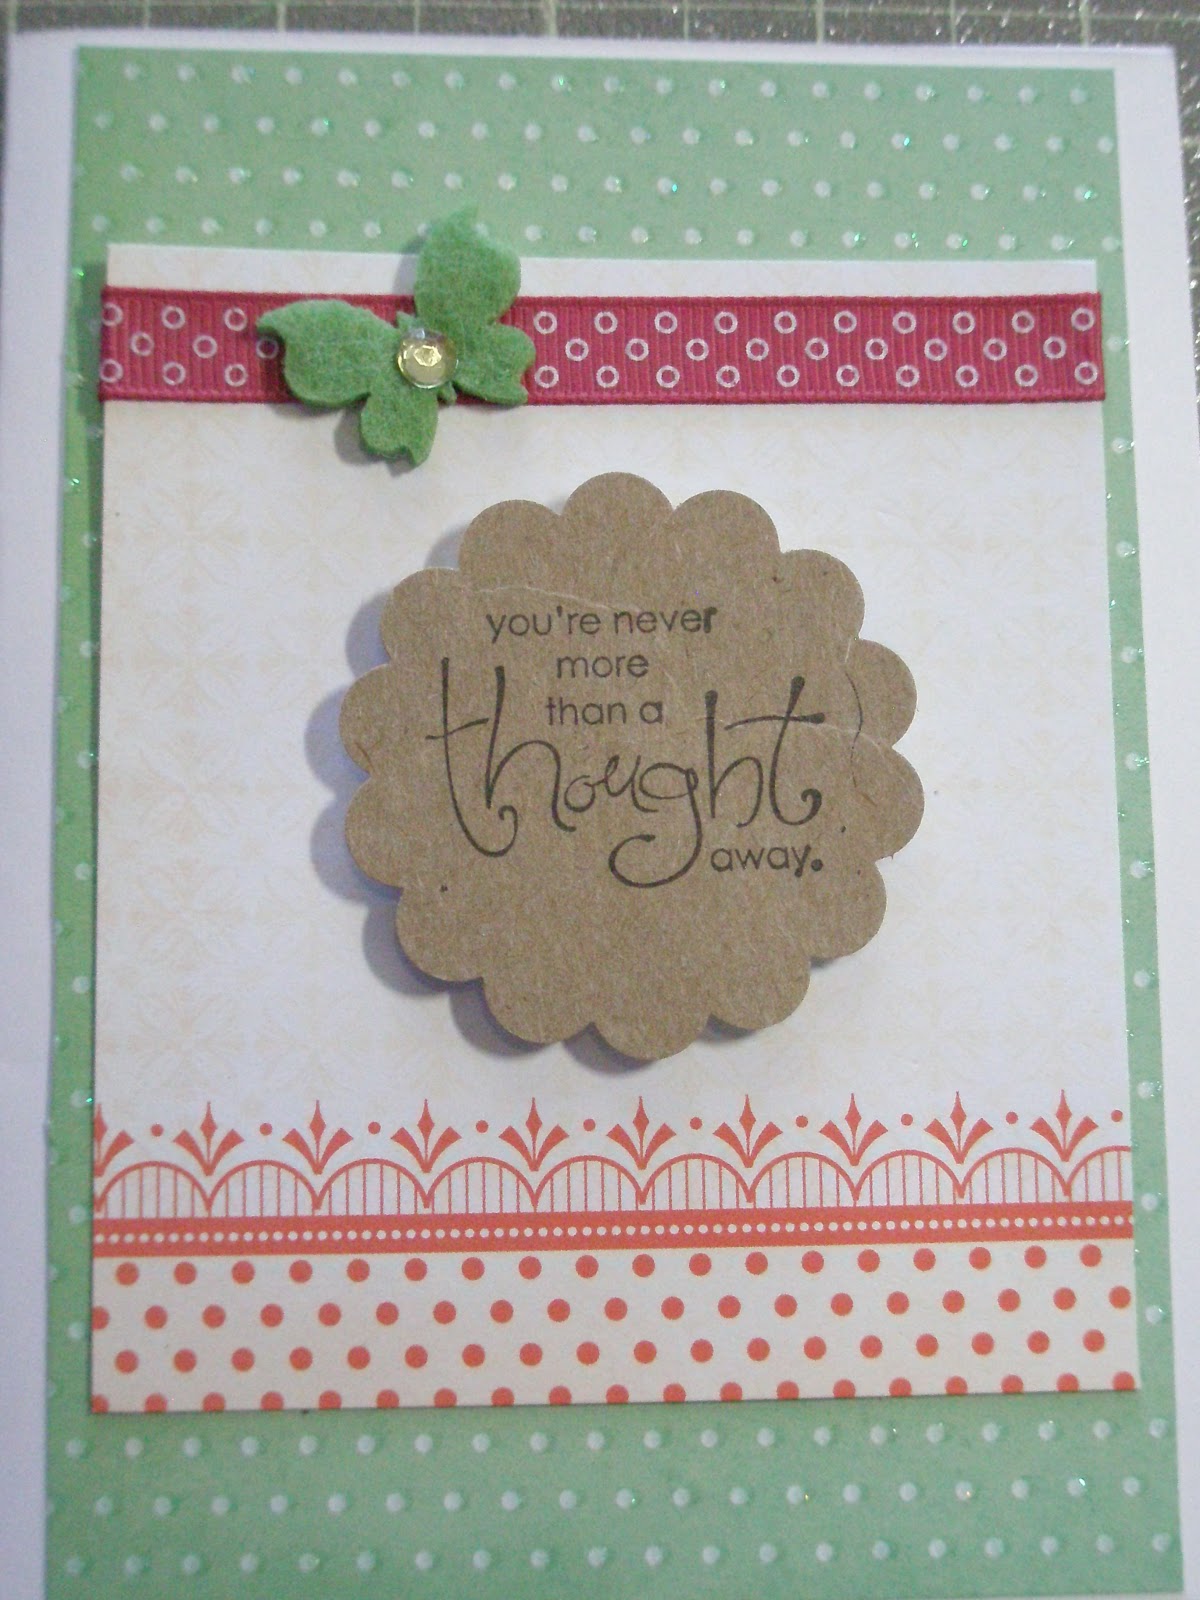
I decided to try and recycle some of the cereal box chipboard I have collected and stamped my sentiment on it and used a scalloped punch and popped it using dimensional tape. The butterfly is made out of felt with a mini pearl from our local craft store in the dollar section as well as the ribbon behind it. Love those thrifty finds!
The paper with the dots and scalloped trim is from a mini stack as well as the green dot paper, again, found many moons ago at Big Lots. If you have never been to a Big Lots you may consider stopping by sometime. Many treasures to be found in their craft section!
Well, that is it for me this time. My blog has been kinda quiet since my return from London as I have been recovering S L O W L Y from pneumonia and bronchitis! Yuck!
Now head on over to CBGM and give her some love, leave us both a comment and become followers of both blogs!
Positive and inspirational comments appreciated!
Happy National Scrapbooking/Crafting Day
Blessings
http://creationsbygillm.blogspot.co.uk/2012/04/cbgm-challenge-4-colour-inspiration.html


Saturday, April 7, 2012
April Design Team Color Challenge

Thanks for stopping by from http://creationsbygillm.blogspot.co.uk/2012/04/cbgm-challenge-4-colour-inspiration.html
for our April Design Color Challenge
This month I created this desk top note/picture holder which my daughter will give to one of her teachers at the end of the school year as a thank you give in her appreciation basket.
This is a spare 3 x 3 piece of wood which I altered with DCWV paper. I predrilled at the top to insert my wire which I bought at the local hardware store. I coiled the top which can hold notes or pictures.
My embellishments are gross grain ribbon in canary yellow, stamped the word "love" with stazon ink in black. My flowers are cut with my Cricut Expression and layered for a dimensional look.
Thanks for stopping by, become one of my followers, and give a shout out of kindness in my comments. I love to hear what you think of my creation(s)!
Blessings,
Saturday, March 17, 2012
Leibster Award

Thank you so much Valerie for selecting me as one of your recipients of the Leibster Award. Become one of my followers and stop on over and Thank Valerie for honoring me with this award!
Stop on over to: http://canonburycreations.blogspot.com/2012/03/leibster-award.html?showComment=1332039061212#c8566751886114062787
Thanks for stopping by!
Blessings
Saturday, March 3, 2012
March design team challenge
Welcome to http://creationsbygillm.blogspot.com/ March challenge of shaped dimensionals.
For this challenge I altered a mini hat box with shades of grey, silver and hints of red. Paper used was from the $1.00 section at a local super store with was perfect for the color scheme I was looking for. I made a pinwheel flower, punched flower in metallic paper along with rolled roses to finish on the lid.


Here are some additional pictures of the inside as well as the mini cards.
Enjoy!


This project was also my Package Pals gift exchange with C.R.A.F.T. http://www.creatingreallyawesomefreethings.com/2012/02/package-pals-linky-party-february.html and my buddy, who lives in Tennessee was the recipient. This was a really fun project to participate in. She in turn made me a necklace with a bird nest...so cute since I love birds along with a homemade key chain which my daughter snatched immediately for her backpack. Thank you Jamie over at C.R.A.F.T. for allowing me to participate! I hope to do it again in the future!
I am also including this project in the Fantabulous Cricut Challenge ( http://fantabulouscricut.blogspot.com/2012/03/challenge-me-monday-103.html) in using at least three flowers for the project. The cricut cartridge I used was from Fabulous Finds. Thanks for stopping by
Thanks for stopping by and taking a look. As always, become a follower, leave me a happy note here at with http://creationsbygillm.blogspot.com/.
Blessings,
Monday, February 20, 2012
When Life Gives You Lemons
Today as I was looking through some of the blogs I follow I noticed one that asked, "why do you blog?". I answere not knowing the disturbing news I would hear later in the day. Our son had an orthodontic appointment this morning. A place our son has been going to for about 6 years, so in turn we think of these people as family. The office manager, Becca is one of the nicest, most personable and kindest person I know. Unfortunately, today she shared she has stage 3 cancer and is on chemo every day.
As you can imagine, this news hit like a ton of bricks. My friends...expect the unexpected! Live life to the fullest with no regrets and always let your loved ones know each and everyday that you love them!
My family means everything to me! I sometimes don't always post or craft because it means more to me to spend time with each and every one of my family members even if it's just taking a walk, watching t.v., or making them their favorite recipe at 10 o'clock at night!
So my answer to the question would be different. I blog to have a podium for everyone to hear others that my be in need! Even in silent prayer!
Please keep our friend and all those out there battling their own form of cancer in your prayers.
Blessings!
Tuesday, January 31, 2012
Craft Room Redo to Crafting RETREAT!
When we moved into our home three years ago I decided to take the smallest of the bedrooms for my craft room. At the time I did not have half the supplies I do now (some can relate, right?) and feeling cramped and in need of more room.

 Here are the before and after pictures! Let me know what you think. Would love your
<-------BEFORE------->


My husband suggested I take the office downstairs but felt guilty thinking to do this since it was custom painted just for him and contained all his sports memorabilia. So I started to think of other solutions. I decided over Christmas break on to switch rooms with my daughter. She was excited to get a "new" room painted her way and I was excited to have more space!
Boy...here I thought we could do it over a weekend after the painting was done. What in the world was I thinking? For those of you who have done this are probably snickering and thinking, "over a weekend"? No way!! Believe me, I learned quickly my unreasonable expectations of finishing and organizing in a week. It took a month!!!! Everything is pretty much in its place. I just need to finalize my labeling and paper organizing. This, I know will take time, but at least it is where it will go for now. The exciting part is I know where everything is! I have done a few projects this week and once I was done and put everything away, it looked just like the pictures! I totally love my crafting retreat!

 Here are the before and after pictures! Let me know what you think. Would love your
feedback :)!

The unit is from IKEA, desk from Target.com, and the smaller shelves which house my stamps and Cricut Cartridges are from Big Lots.

This unit is from Target (shelves on sides and the desk in the center) the unit above with the divided cubies and the top shelf was custom made by my amazing, crafty husband and Eagle Scout - Son! I have them both to thank for all their help, painting our rooms and moving things from one room to another and removing what we didn't need! I love you both for all you do and all you support!
Well, there it is...I hope you get some inspiration from my space! I totally love it and hope to spend more time in here now as everything has a place and a place for everything!
BLESSINGS!
Friday, January 20, 2012

Please leave a comment on my blog, become a follower and leave a comment on the http://www.simple-stories.com/ site then move on to the next designer. Added BONUS: For the blogger with the most comments wins a prize package from Simple Stories along with one of you! YES! one of you will also have the opportunity to win a prize package as well! So go ahead...leave those comments and lets win!:)

My project is a multi fold out mini album which contains many areas for journaling, photos and keepsakes.

When opened the front covers display the large area for pictures and journaling. When the middle area is opened, more is available to display those special photo moments.


Thank you for stopping by, don't forget to become a follower of my blog, leave a comment for an opportunity to win a special package from Simple Stories for the both of us!
HAPPY BLOG HOPPING!
1. Simple Stories http://www.simple-stories.com/
2. Martha Saenz: http://welcometomarthaworld.blogspot.com/
3. Simple Stories design team member, Kim Holmes http://www.theholmescrew.blogspot.com/
4. Amanda Albright: http://asquared.typepad.com/
5. Cindy Pittman: http://scrapixie.blogspot.com/
6. Simple Stories design team member, Emily Pitts http://www.emilypitts.blogspot.com/
7. Sara O’Shea: www.knittingprose.com
8. Simple Stories design team member, Allison Landy http://scrapsrfun.typepad.com/
9. Kate Blue: http://kateblue.blogspot.com/
10. Simple Stories design team member, Wendy Morris http://scrapnspire.blogspot.com/
11. Naomi Armenta: http://snipitytweetwhispers.blogspot.com/ <---here
12. Michelle Brekke: http://wildnkrazie.blogspot.com/
13. Simple Stories design team member, Liz Qualman http://lizqualman.blogspot.com/
Friday, January 6, 2012
Decoupage Mini notebook
Hi and thanks for joining in on the Decoupage challenge from http://creationsbygillm.blogspot.com/
Today I have for you a mini notebook decoupaged with homemade paper from a local paper company which contains the lilac flowers you see in the background. I brushed my adhesive medium with a sponge applicator allowing to completely dry, then I applied my paper while smoothing out any bubbles which may have appeared. I sponged the edge of the mini book with antiquing stain, applied my edge made with a MS punch front and back, then finished it off by stamping my sentiment. Flowers were made with a scalloped punch and twirl cut. A guilling needle was used to circle my paper to create my desired shape for the flower. The background "leaves" are scraps I had from another project.
I truly love how this came out. It was simple, looks elegant and would make a wonderful gift for someone special!
Thanks again for stopping by and visiting my blog. Happy comments are welcome!


Saturday, December 24, 2011
Lilac and Blue Design Challenge
 My layout consist of AC paper in Blue with the background paper being in Lilac. I created the shape with my "Bloom" cricut cartridge as well as the bird cage with accent flowers in purple. My swirl in the upper left hand corner is premade from a cartridge as well. My "rolled" flowers were made using a scalloped punch. Cut from the outside in in a swirl pattern and then twirled with a quilling pen.
 Hope you enjoyed visiting from http://creationsbygillm.blogspot.com/ Lilac and Blue challenge!
Friday, December 23, 2011
Merry Christmas to Everyone
 |
Wishing each and everyone one of you a very Merry Christmas from my home to yours. Blessings~ Feliz Navidad! |
Thursday, December 22, 2011
I won a variety of AC markers in their AC Celebrate the Season giveaway!

Head on over to American Crafts blog and see all they have to offer in making any crafting project you have in mind simplified!
http://americancrafts.typepad.com/
Blessings!

Saturday, December 10, 2011
Merry Christmas Fold Out Christmas Card


Welcome to by blog and viewing my Christmas Card I created for http://creationsbygillm.blogspot.com/
as her guest designer for December.
I created a gate fold out card using DCWV Textured Multistack and Christmas paper complementing the various "spots" in the card from a paper stack I bought from a local craft store. The tree is backed with a rosette made out of cardstock in a wine color with the tree itself made using a "square" method stacked up to create the tree form then edged in old olive. Christmas Red Stickles used for added bling.
The "happy holidays" sentiment is made on kraft paper using a stencil and Texture Magic in Country Red.
Very simple, but elegant with a personal touch.
Thank you for stopping by.
I wish each and everyone of you a very Merry Christmas, many blessings in the New year 2012!
Feliz Navidad!
Subscribe to:
Posts (Atom)